To show how FME can also control printing out the 3D model after it has created it, I’ll create a workspace that creates the pegs to fit in the scorer and have it automatically slice the STL file, send it to the printer and start it printing. Obviously this will just have to be a local workspace, either in FME Form or an in house FME Flow so you will just have to trust me that it all works. Maybe at an FME World tour I can do a live demo.
The first step is copied from the scorer workspace which is to create a unique filename for the STL file.
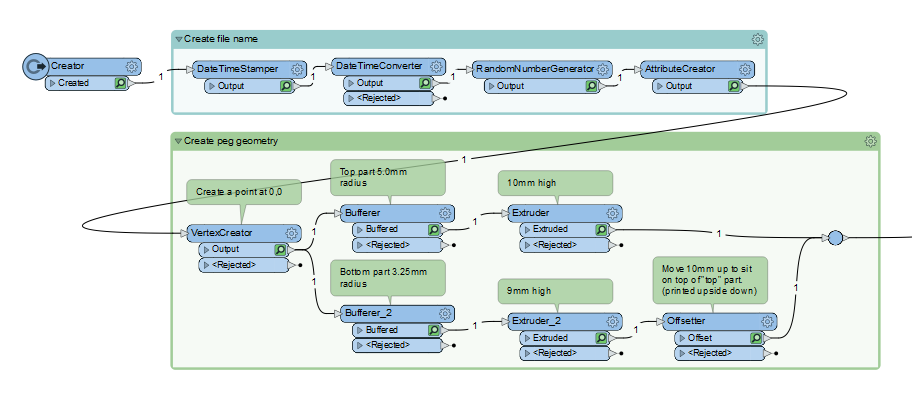
Next is to create the geometry for the peg. This fairly simple as it is one cylinder of 5mm radius and 10mm high and a second cylinder of 3.25mm radius and 9mm high sitting on top of the first (it is printed upside down to avoid overhangs).
The geometry is then written to an STL file with a FeatureWriter, using the unique file name, and sliced with Cura using a SystemCaller.
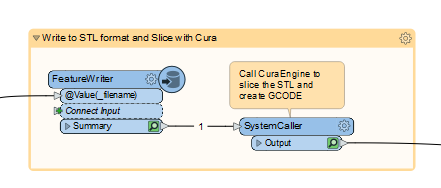
The command line I use is:
""C:\\Program Files\\Ultimaker Cura 5.2.1\\CuraEngine.exe" slice -j "C:\\Program Files\\Ultimaker Cura 5.2.1\\share\\cura\\resources\\definitions\\fdmprinter_gary.def.json" -o "D:\\Temp\\3d designs\\fme\\gcode\\@Value(_feature_types{0}._filename).gcode" -l "D:\\Temp\\3d designs\\fme\\stl\\@Value(_feature_types{0}._filename).stl" -s roofing_layer_count=0"The hardest part in figuring out how to run CuraEngine from the command line was in creating a custom fdmprinter_gary.def.json file containing all the default options for the Ender 3 V2 printer and the options I wanted to use such as print temperatures and to use a brim rather than a skirt. Please let me know if would like a post on that process (FME could be used to help combine three json files but I did it manually) or if you would like my definition file.
The result of this step is a gcode file ready to upload to the printer.
The rest of the automation process uses the OctoPrint API https://docs.octoprint.org/en/master/api/index.html. Before making any API calls you need to generate a token in the OctoPrint UI.
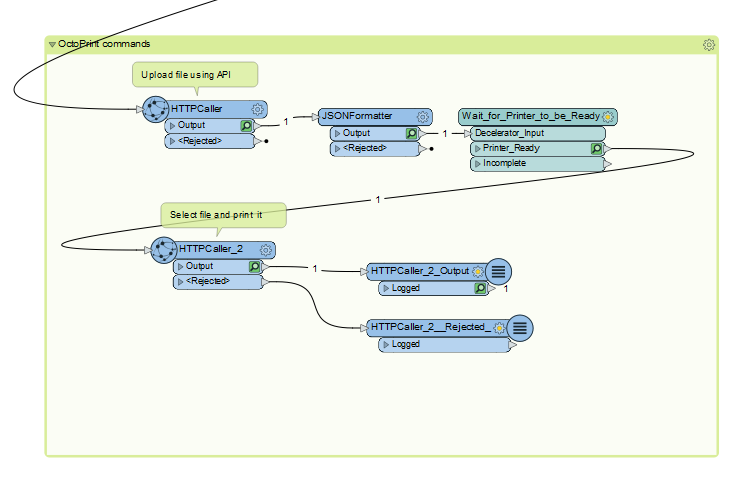
The first step is to upload the gcode file to OctoPrint with the HTTPCaller. This uses the http://octopi/api/files/sdcard end point. My Raspberry Pi is just called octopi.
Depending on the size of the gcode file this will take several minutes to complete so the workspace uses a looping custom transformer to check the status of the printer every minute until it is ready to print.
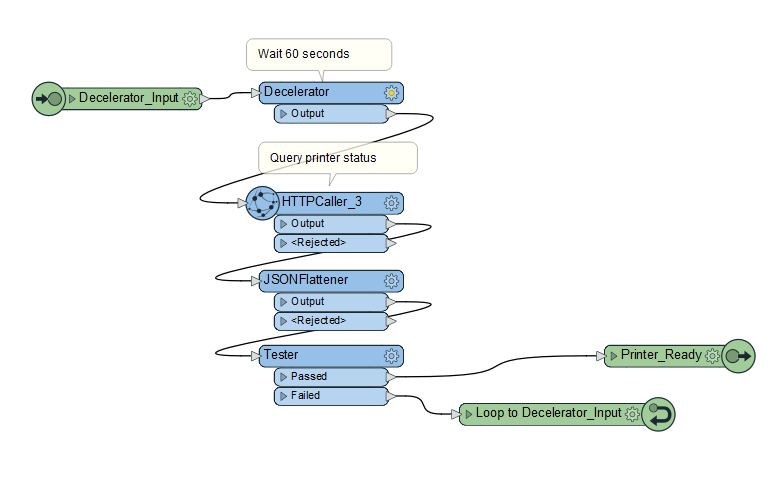
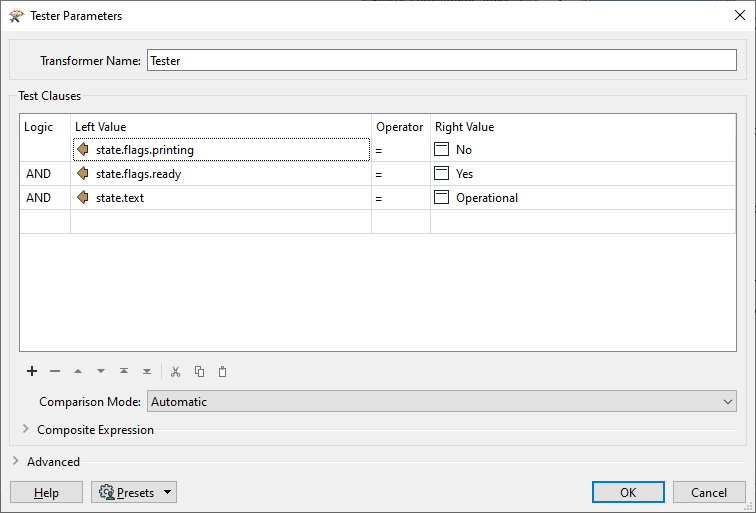
The API call is just a GET request to http://octopi/api/printer and it is looking for the following status flags before continuing.
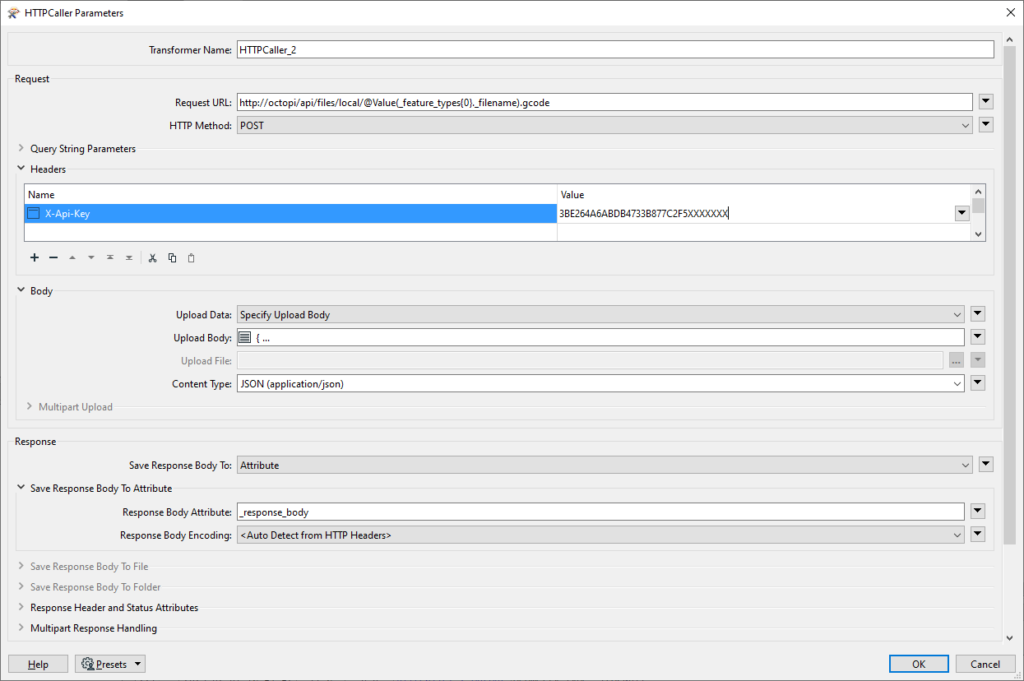
Once the printer is ready the file is selected and printing started with this API call

The upload body to do this is simply:
{
  "command": "select",
  "print": true
}
The end result is that running the workspace creates a 3D peg with no further input, other than making sure the printer is ready for printing and keeping an eye on it for the normal safety issues.
For any enquires related to FME and 3D printing please contact Locus.